


Resources
Outdoor Skills
Thirty-five bite-size wilderness tutorials — the kind of things you want in your head before you need them. Each skill is one screen: three to six steps, a tip, and any real warnings.
35 skills
Fire
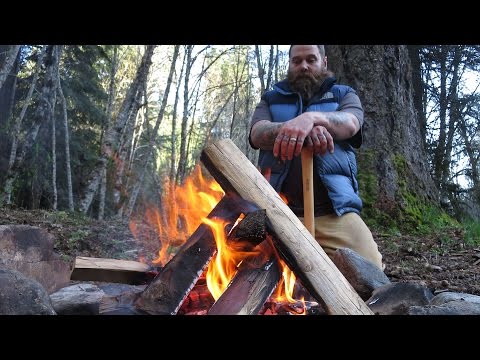
5 minLight a one-match fire
A single match is enough when the platform is built before the match comes out.
- Clear a dry patch of ground down to mineral soil or lay a bark platform.
- Prepare three graded piles: fine tinder (dry grass, birch bark, fatwood shavings), pencil-thick kindling, and thumb-thick sticks.
- Build a small teepee of the finest tinder with a pencil-lead-thin gap to insert the match.
- Strike the match toward the ground, cup it, and touch it to the lowest point of the tinder.
- Feed pencil-thick kindling on as the flame climbs; only add thumb-thick sticks once flames stand on their own.
Tip: Split a wet stick — the inside is almost always dry. Shave that inside into a pile of curls.
Trailagain — The One Match Fire

Fire
4 minCarve a feather stick
A feather stick turns one dry piece of wood into a fire's worth of tinder.
- Pick a dry, straight-grained stick the diameter of your thumb. Split it if the outside is damp.
- Brace one end on a solid surface at a shallow angle away from your body.
- Slice long, thin curls with the knife, stopping short so the shavings stay attached.
- Rotate the stick a quarter turn and repeat until the top third is a bloom of curls.
Tip: Sharper knife, thinner curls. If the shavings snap off, ease the angle and slow down.
Far North Bushcraft — Feather Stick Tips
Fire
20 minMake char cloth for flint and steel
Char cloth catches a spark instantly and buys you a full ember to blow into flame.
- Cut 100% cotton (old jeans, canvas) into 2-inch squares.
- Pack loosely into a small tin with a single pin-hole punched in the lid.
- Set the tin on coals — smoke will jet from the hole.
- When the smoke stops, pull the tin off and plug the hole with a twig; let it cool sealed.
- Cloth should be uniformly black, still flexible, and tear cleanly.
Warning: Opening the tin while hot lets oxygen in and burns your char to ash.

Fire
15 minBow drill: what actually matters
Friction fire fails on details. Get these right before the arm burns out.
- Match soft, dry woods for spindle and hearth (cedar, cottonwood root, willow). Don't mix hard and soft.
- Spindle: thumb-thick, 8 inches, blunt on bottom (friction end), pointed on top (bearing end).
- Cut a pie-slice notch in the hearth board reaching to the center of the burn socket, so dust can pile up.
- Bow: shoulder-wide, slight curve, loose cord that tightens once the spindle is loaded.
- Long, full strokes; downward pressure only increases once black dust and smoke are steady.
- Tap the ember out of the notch onto bark, transfer to a tinder bundle, and blow steady from below.
Tip: If it squeals, it's polished — rough up the socket and hearth with sand.
NatureMentor — Bow Drill Fire
Fire
5 minFind dry tinder in wet woods
Standing dead wood and inner bark stay dry through days of rain.
- Skip anything on the ground — it's wicking water.
- Look for standing dead branches still attached to trees; snap them for a dry, sharp crack.
- Peel birch bark from dead trees only; it lights wet.
- Pull inner bark from dead cedar or juniper and shred between the palms into a fluff.
- Look under conifer skirts for dry needles and pitch-soaked wood (fatwood) at stump bases.

Water
10 minFind water in dry country
Water moves down and collects predictably — read the terrain first, then walk.
- Head to the lowest ground: canyon bottoms, dry washes, the outside bends of dry riverbeds.
- Dig at the base of cliff pour-offs and in shaded gravel bars — seep water rises in minutes.
- Follow converging animal trails downhill; they braid toward water.
- Watch for green vegetation (cottonwood, willow, cattail) standing out from the surroundings.
- At dawn, look for insects, especially bees — most fly within a mile of water.
Warning: Always purify seep and puddle water; livestock and wildlife share the same holes.
Chad Zuber — Water in the Desert

Water
10 minPurify water by boiling
A rolling boil kills every waterborne pathogen you'll meet in the field.
- Pre-filter through a bandana or shirt to remove silt and debris.
- Bring the water to a full rolling boil — bubbles across the whole surface, not just the sides.
- Hold the rolling boil for 1 minute (3 minutes above 6,500 ft / 2,000 m).
- Cover and cool. Pour between two containers to reoxygenate and improve taste.
Tip: No pot? Boil in a birch bark cone or a hollowed log with rocks heated in the fire.
Bushcraft Survival Australia — Filter & Boil

Water
15 minBuild a three-layer ground filter
A field filter clears silt and cuts pathogens — it doesn't replace boiling.
- Cut the bottom off a bottle (or use a bark cone) and invert it over a catch vessel.
- Bottom layer: coarse pebbles, two fingers deep.
- Middle layer: clean sand, three fingers deep.
- Top layer: crushed charcoal from your fire, three fingers deep.
- Pour cloudy water in slowly; the first pass may run dirty — recycle until clear.
- Boil the filtered output before drinking.
Warning: Charcoal only — never ash. Ash makes the water caustic.
Clay Hayes — Charcoal & Sand Filters

Water
30 minCollect dew with a bandana
Dew off unpoisoned grass gives you a cup or two before sunrise.
- Before dawn, tie a clean bandana or shirt around your calves.
- Walk slowly through tall, ungrazed grass until the cloth is soaked.
- Wring the cloth into a container. Repeat until sun burns off the dew.
- Purify before drinking — dew picks up whatever's on the plants.
Warning: Skip grass near roads, farmland, or animal droppings.
Military.com — Collect Dew for Drinking

Water
30 minSolar still basics
A solar still gives small amounts of clean water at a large cost of sweat.
- Dig a pit two feet wide and a foot deep in a sunny spot with damp soil or green vegetation.
- Place a container in the center; line the pit with green plants around it.
- Cover the pit with a clear plastic sheet and seal the edges with soil.
- Set a small stone on the plastic directly over the container to form a low point.
- Water condenses on the underside, runs to the low point, and drips into the container.
Tip: Yield is small — a still is a supplement, not a plan. Dig it only if you're already staying put.
Von Malegowski — Solar Still

Shelter
90 minBuild a debris hut
A debris hut is the warmest one-person shelter you can build with no cordage.
- Prop a stout ridgepole (twice your height) between a low fork and the ground.
- Lean ribs of sticks along both sides at 45°, packed tight enough to hold leaves.
- Pile leaves, ferns, or grass on the outside — three feet deep everywhere.
- Stuff the inside with dry leaves until you have to burrow in.
- Plug the entrance behind you with a backpack or a bundle of debris.
Tip: If a raccoon couldn't push through the wall, it's thick enough to hold body heat.
Tom Brown III — Survival Shelter
Shelter
20 minSite a tarp for wind and rain
Where you pitch matters more than what you pitch.
- Skip valley bottoms — cold air pools there overnight.
- Skip ridge tops — wind hammers exposed sites.
- Look mid-slope, back into a treeline, with the closed end into the wind.
- Check overhead for widow-makers: dead branches, leaning trees, loose rock.
- Pitch the low end downhill so water runs away, not under your bag.

Shelter
30 minInsulate a sleeping platform
The ground steals more heat than the air. A bed of debris is warmer than any bag on bare dirt.
- Rake a bed area longer than you are tall and twice as wide as your shoulders.
- Lay a base of small logs or thick branches across the bed.
- Pile springy conifer boughs, dry grass, or ferns on top — four inches compressed, eight before you lie on it.
- Frame the sides with logs so debris doesn't squirt out overnight.
- Add a hot-rock heater at the foot if you have a fire going nearby.
Botanik Bushcraft — Shelter Build

Shelter
45 minDig a one-night snow trench
A trench is faster than a quinzhee and warmer than a tarp when you have snow but no time.
- Find snow at least chest-deep. Test-probe with a stick for hidden rocks and roots.
- Dig a body-length trench slightly wider than your shoulders and knee-deep below the trench floor.
- Roof it with skis, poles, or sturdy branches laid across the top, then blocks of cut snow.
- Leave a small vent hole for CO₂ and mark it from outside with a ski or stick.
- Line the floor with a pad or thick bough bed before you get in.
Warning: Never seal a snow shelter completely — suffocation is a real risk without a vent.
Gone Feral — Snow Trench Shelter

Navigation
15 minFind north with a stick and shadow
A shadow moves west to east through the day — that gives you a true east-west line.
- Push a straight stick vertically into flat, level ground in the sun.
- Mark the tip of the shadow with a small stone. Wait 15-20 minutes.
- Mark the new tip of the shadow with a second stone.
- The line between the two stones runs west-to-east; first stone is west.
- Stand with the first stone at your left foot and the second at your right — you're facing north.
Tip: Longer wait, more accurate line. This works anywhere the sun casts a shadow.
AlfieAesthetics — The Primitive Compass

Navigation
5 minRead a topo map in one minute
Contour lines tell you shape and steepness — the whole map is in the spacing.
- Close-spaced lines = steep. Wide-spaced = gentle.
- V's pointing uphill = drainage or creek. V's pointing downhill = ridgeline.
- Circles inside circles = a summit; hachured circles = a depression.
- Blue = water, green = vegetation, white = open/rock/snow, brown = elevation.
- Check the contour interval in the legend before guessing elevation.
REI — How to Read a Topo Map

Navigation
10 minNavigate by handrails and catching features
Two habits that keep you found without a GPS: follow a handrail, aim past a catch.
- Pick a linear feature parallel to your route — a river, ridge, road, or valley. That's your handrail.
- Walk keeping the handrail on the same side, checking it visually every few minutes.
- Choose a catching feature past your destination — a river, cliff, or trail perpendicular to your route.
- If you hit the catching feature, you've overshot — turn back along the handrail.
- Aim off deliberately: bias 5-10° left or right of the target so you always know which way to turn at the catch.
Mowser — Essential Hiking Navigation

Navigation
10 minMeasure distance with a pace count
Knowing your pace count over 100 m tells you how far you've walked without a GPS.
- Measure or step off 100 meters on flat, open ground.
- Walk it at a natural pace, counting every time your left foot lands. That's your pace count.
- Typical adult: 60-70 paces per 100 m.
- In broken ground, up hills, or with a heavy pack, add 20-30% to your count.
- Track distance with pebbles or knots — one per 100 m walked.
SF Actual — Basic Land Navigation
Food
15 minSet a simple wire snare
A well-placed snare beats a well-tied one. Read the trail before you set anything.
- Find a fresh, narrow game trail — droppings, tracks, low-brushed vegetation.
- Choose a natural pinch point where brush forces animals through single-file.
- Form a loop in snare wire the size of a fist for rabbits, larger for bigger game.
- Suspend the loop over the trail so the bottom sits at the animal's chin height.
- Anchor to a sapling or heavy branch. Brush around the loop so animals can't sidestep.
Warning: Check local law — snaring is regulated everywhere and prohibited in many places outside survival need.

Food
20 minIdentify wild edibles safely
You don't have to know every plant — you have to know a few, cold.
- Learn 5-10 edible species in your home region with 100% ID confidence — leaf, stem, fruit, and habitat.
- Learn their toxic look-alikes at the same time.
- Positive ID means multiple features match, not just one.
- Never rely on the Universal Edibility Test in the field — it's slow, error-prone, and can hurt you.
- When in doubt, leave it out.
Warning: Some deadly plants (water hemlock, false hellebore, death camas) resemble common edibles. Guess = don't eat.
Robin Greenfield — Easy Edible Plants
Food
30 minFish with a hand line
A hand line and a hook out-fish most improvised setups.
- Wrap 30-50 ft of line around a smooth stick or bottle to keep it tangle-free.
- Tie on a small hook and a stone or split-shot for weight.
- Bait with grubs from under bark, worms from wet soil, or minnows caught with a shirt seine.
- Cast underhand from cover; let the bait sink to where fish hold — undercut banks, log jams, current seams.
- Set the hook with a firm wrist snap the moment you feel the tap.
Tip: Fish are more active at dawn and dusk. If nothing hits in 15 minutes, move.
Food
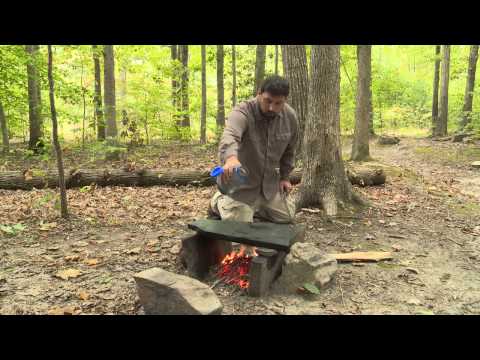
20 minCook on a hot rock
A flat, dry rock in the coals is a griddle for fish, meat, and bannock.
- Pick a flat, dry rock from well above the waterline — never from a stream or lakeshore.
- Bury it in the fire's coals for 20 minutes so it heats evenly.
- Brush off ash. Test with a drop of water — it should sizzle and skip.
- Lay fish or meat directly on the rock; flip once when the underside releases cleanly.
Warning: Wet or river rocks trap steam and can explode in a fire.
Outdoor Life — Cook Food on a Rock

Ice & Cold
5 minTell if ice is safe to cross
Color, thickness, and history — check all three before you step out.
- Clear blue or black ice is the strongest. White or opaque ice is half as strong. Grey ice is unsafe — leave it alone.
- Thickness rules of thumb on clear ice: 4 in / 10 cm to walk, 5-7 in / 12-18 cm for a snowmobile, 12+ in / 30+ cm for a light truck.
- Drill or chop test holes every 50 ft on unknown ice and measure — don't guess.
- Skip inlets, outlets, springs, currents, and any area with cracks radiating from a point.
- Avoid ice near docks and pilings; dark objects absorb heat and thin the ice around them.
Warning: No ice is guaranteed safe. If you break through, kick horizontally, get your arms flat on solid ice, and roll — don't try to climb.
Jason Mitchell — Ice Safety Checklist

Ice & Cold
5 minPrevent frostbite on hands
Once your fingers stop hurting in the cold, you have about 20 minutes.
- Layer: thin liner glove for dexterity, insulated shell for warmth. Never take both off at once.
- Keep hands moving. Fists, windmilling arms, wiggle fingers inside the glove.
- Never handle cold metal or fuel with bare skin below freezing — contact frostbite is instant.
- If fingers go numb, warm them under armpits or against a companion's stomach until sensation returns.
- Add a hat — vasoconstriction to the hands worsens fast when the head is cold.
Warning: Do not rub frozen tissue with snow or hold near a fire. Warm slowly with body heat or 100-105 °F water.
Dr. Ebraheim — Frostbite Prevention
Ice & Cold
30 minWarm a hypothermic person in the field
Get them dry, insulated, and out of the wind before you do anything else.
- Move them out of wind and off cold ground onto a pad, pack, or bough bed.
- Cut off wet clothing and dry the skin. Wet cotton pulls heat 25x faster than dry.
- Wrap in insulation: sleeping bag, spare clothes, tarp burrito over the top.
- Add heat sources at the neck, armpits, and groin — hot water bottles wrapped in a shirt work well.
- Give warm sugary drinks only if fully alert. No alcohol.
Warning: A severely hypothermic person may seem drunk or drowsy. Handle gently — rough movement can trigger cardiac arrest.

Signaling
20 minBuild a signal fire that gets seen
The point of a signal fire is smoke and contrast, not warmth.
- Pick a spot with a wide sky view — a ridge, clearing, or lakeshore. Not under trees.
- Build three fires in a triangle 25 m apart if you have the fuel; three of anything is a distress signal.
- Keep a pile of green boughs, wet moss, or damp grass at each fire, ready to dump on.
- Against snow use dark smoke: green vegetation. Against dark forest use white smoke: damp grass, moss.
- Only light when you actually hear or see a search — smoke ignored is smoke wasted.
Bear Grylls — Perfect Signal Fire

Signaling
5 minAim a signal mirror at an aircraft
A signal mirror is visible 20+ miles on a clear day — but only if you aim it.
- Hold the mirror close to your face and sight through the aiming hole (or over the top edge).
- Extend the other hand as a V with two fingers framing the aircraft.
- Tilt the mirror until the bright spot from the sunbeam lands on your fingers.
- Sweep across the aircraft repeatedly — a moving flash catches attention.
- Even without a proper mirror, use a phone screen, CD, or polished can lid the same way.
MNWoodland — How to Use a Signal Mirror

Signaling
10 minGround-to-air signals every pilot knows
Five internationally recognized symbols. Make each one 10 ft / 3 m tall in high-contrast material.
- V = require assistance.
- X = require medical assistance.
- N = no or negative.
- Y = yes or affirmative.
- → (arrow) = proceeding in this direction.
- Stomp them into snow, dig them into sand, or lay them out in dark logs on light ground.
Tip: Size and contrast matter more than shape. From 2,000 ft, small is invisible.
Forest & Lands — Signaling 101
Tools & Cordage
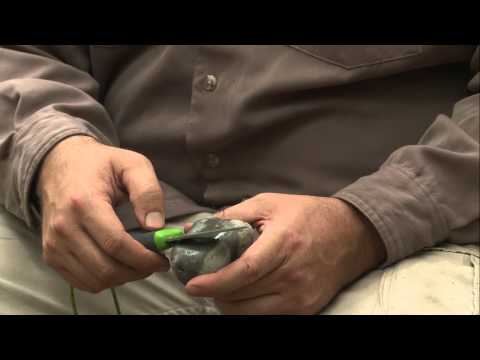
10 minSharpen a knife on a river stone
A smooth, flat river stone is a serviceable field whetstone.
- Pick a stone with a flat, fine-grained face. Wet it thoroughly.
- Hold the knife at roughly 20°: the thickness of two stacked coins between spine and stone.
- Sweep the edge across the stone like you're slicing a thin layer off it.
- Do 10-15 strokes per side, alternating until you feel a burr along the whole edge.
- Finish by stropping on your belt, denim, or the inside of a leather boot.
Tip: A knife sharp enough to shave the hair off your forearm is sharp enough.
Outdoor Life — Sharpen a Knife with a Rock

Tools & Cordage
20 minMake cordage from tree bark
Two-ply reverse-wrap cordage from inner bark is strong enough for a bow drill or shelter lashing.
- Strip long ribbons of inner bark from dead cedar, basswood, willow, or dogbane.
- Split the ribbons to pencil-lead thickness. Bunch them into two equal strands.
- Twist one strand away from you until it kinks, then bring the other strand over it.
- Twist the new top strand away, wrap it over — repeat, feeding in new fiber as strands thin.
- Splice new fiber staggered so the joints don't line up.
Far North Bushcraft — Willow Bark Cordage

Tools & Cordage
15 minThe four knots that matter
Skip the rest until these are automatic.
- Bowline — a fixed loop that never slips or jams. Rescue, anchoring, tarps.
- Taut-line hitch — an adjustable loop for tent guy lines. Tighten or loosen by hand.
- Clove hitch — quick attachment to a pole or post. Great for starting lashings.
- Trucker's hitch — a pulley for tensioning a line. Ridge lines, cargo, tarps in wind.
Tip: Practice each 20 times with cold, wet hands and eyes closed. That's field-ready.
Trailguide — Clove Hitch (start here)
First Aid
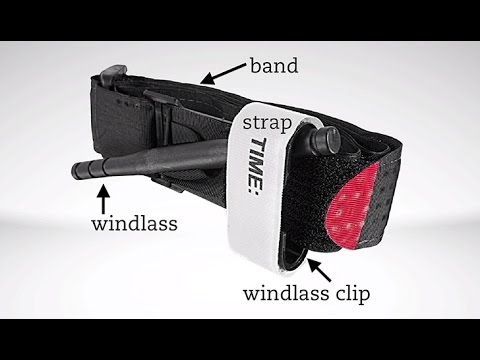
5 minStop severe bleeding
You have minutes. Direct pressure first, tourniquet if it doesn't stop.
- Press hard directly on the wound with any cloth — shirt, bandana, hand. Do not lift to look.
- Elevate the injury above the heart if possible.
- Hold pressure for at least 10 uninterrupted minutes.
- If blood soaks through, add material on top — do not remove the first layer.
- If bleeding won't stop on a limb, apply a tourniquet 2-3 in above the wound, tight enough that the bleeding stops. Note the time.
Warning: A properly applied tourniquet hurts. Once on, it stays on until a medical professional removes it.
American College of Surgeons — Tourniquet

First Aid
5 minStop a blister before it forms
The moment you feel a hotspot, stop. Two more miles turns hotspot into open wound.
- At the first burn or rub, take the boot off. Don't wait for camp.
- Dry the foot and sock completely.
- Cover the hotspot with athletic tape, moleskin, or duct tape — the patch must extend well past the friction zone.
- Smooth every wrinkle in the sock before re-lacing.
- Recheck within the hour; adjust before it goes through.
Tip: If the blister has already formed, don't pop it in the field. Ring it with padding and leave it intact.
Mowser — Why You Get Blisters

Weather
5 minRead the sky for coming rain
Clouds move faster than fronts. You have hours of warning if you look up.
- High, wispy cirrus followed by lowering, thickening clouds = warm front, rain in 12-24 hours.
- Towering cumulus building vertically in the afternoon = thunderstorms within hours.
- A halo around sun or moon = high moisture aloft, weather worsening in 24-36 hours.
- Sudden wind shift and dropping temperature = cold front, fast squall likely.
- Sharp, distant horizon = dry air. Hazy horizon = moist air, storms more likely.
Tip: Red sky at night reflects dry air to the west — clearing. Red sky in morning reflects moisture arriving — deteriorating.
NatureMentor — Cloud Types & Weather

Field Skills
45 minFind and process wild clay
Clay is everywhere along streambanks and cutbanks — you just have to test for it.
- Look at cutbanks, riverbends, and exposed subsoil below the leaf layer.
- Grab a handful, wet it, and roll a snake the thickness of a pencil.
- If it bends around your finger without cracking, it's usable clay.
- Slake: break it up in water, stir, let sit. Sand and gravel sink, clay stays suspended.
- Pour off the milky water into a cloth-lined pit; let it drain until leather-hard, then wedge (knead) to remove air.
Tip: Test-fire a small pinch pot in a hot fire. If it survives without exploding, the clay's clean enough to use.
Andy Ward — Wild Clay for Beginners
Educational reference only. Wilderness conditions change fast — practice in low-stakes settings, take a certified wilderness first-aid course, and confirm regional regulations (fire, fishing, foraging, snaring) before you rely on any of these skills in the field.